Six Essential Tips for Composting Cardboard at Home
This post may contain affiliate links which means I may receive a commission for purchases made through links. As an Amazon Associate, I earn from qualifying purchases. Learn more on my Private Policy page.
When composting cardboard at home, opt for uncoated, plain, or unbleached cardboard. Tear or shred it into smaller pieces and mix with green materials. Layer cardboard in your compost bin for airflow and balance with nitrogen-rich items. Keep it moist with methods like spraying or soaking. Turn the compost weekly to enhance decomposition. Monitor temperature, odor, and overall health of the pile. Composted cardboard enriches soil by retaining moisture, preventing weeds, and providing nutrients for plants. Troubleshoot odors, pests, and speed up decomposition. Mastering these tips ensures successful cardboard composting for vibrant gardens.
Choosing the Right Cardboard
When selecting cardboard for composting at home, ensure it's free from glossy coatings and colored prints to avoid harmful chemicals in the composting process. Cardboard thickness plays a crucial role in how quickly it breaks down in compost. Thicker cardboard takes longer to decompose fully. Opt for thinner cardboard as it decomposes faster, aiding in the composting process. Look for cardboard labeled as 'uncoated' or 'plain' to ensure it doesn't contain any glossy coatings that can introduce unwanted chemicals into your compost pile. These coatings are often made of substances like plastic or wax, which can hinder the decomposition process and harm the microorganisms that break down the materials.
When considering cardboard for composting, pay close attention to how it's labeled. Cardboard labeled as 'recycled' or 'unbleached' is preferable for composting as it indicates that fewer chemicals were used in its production. These types of cardboard are more environmentally friendly and break down easier in the compost pile. On the other hand, cardboard labeled as 'coated,' 'colored,' or 'shiny' should be avoided as they may contain inks, dyes, or coatings that can introduce toxins into your compost.
Preparing Cardboard for Composting
To prepare cardboard for composting effectively, ensure it's torn or shredded into smaller pieces to accelerate the decomposition process. Breaking down cardboard into smaller bits increases the surface area, allowing for quicker microbial activity and decomposition.
Here are some steps to help you prepare your cardboard for composting:
- Use the Right Tools: Invest in a good quality shredder or simply tear the cardboard by hand. Shredding cardboard isn't only a more efficient way to break it down, but it also helps in creating air pockets within the compost pile, aiding in the aeration process.
- Mix with Green Material: When shredding cardboard, make sure to mix it with green material like kitchen scraps or grass clippings. The combination of brown material (cardboard) with nitrogen-rich green material provides a balanced diet for the composting microbes, ensuring a healthy decomposition process.
- Monitor Moisture Levels: After shredding the cardboard, check the moisture content. Cardboard tends to absorb moisture quickly, so it's essential to ensure the compost pile has the right moisture levels. Aim for a damp sponge-like consistency; this will help in the breakdown of the cardboard and overall composting process.
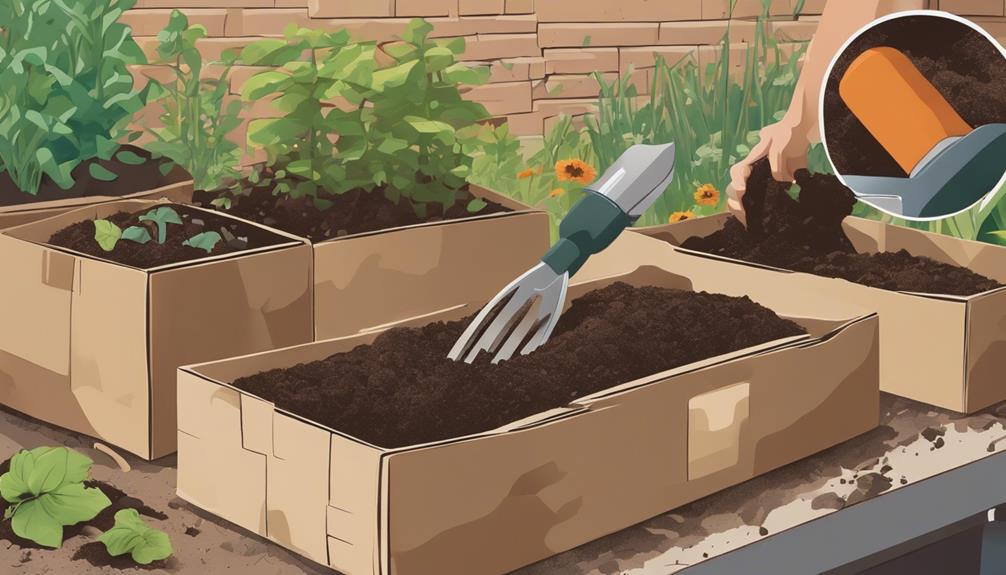
Layering Cardboard in Your Compost Bin
Layering cardboard in your compost bin enhances the decomposition process by providing a structural foundation that promotes airflow and microbial activity. Cardboard is an excellent source of carbon for your compost pile, balancing the nitrogen-rich materials typically found in kitchen scraps and green waste. Achieving a proper carbon balance is crucial for the success of your composting efforts.
When you layer cardboard in your compost bin, you create air pockets that allow oxygen to reach the microorganisms responsible for breaking down organic matter. This aeration is vital for maintaining a healthy compost pile and promoting microbial activity. Microorganisms such as bacteria and fungi feed on the cardboard, breaking it down into valuable humus that enriches your compost.
Research suggests that incorporating cardboard into your compost pile can improve its overall structure and water retention capabilities. The fibrous nature of cardboard helps create a diverse environment for beneficial microorganisms to thrive. Additionally, as the cardboard decomposes, it releases nutrients slowly, providing a sustained food source for the microbes driving the composting process.
Moistening the Cardboard
Moistening cardboard before adding it to your compost bin facilitates the breakdown process by creating an environment conducive to microbial activity and decomposition. Proper moisture management is crucial for successful cardboard composting, as cardboard can easily contribute to composting challenges by drying out too quickly.
To effectively moisten cardboard for your compost pile, follow these essential tips:
- Use a Spray Bottle: Fill a spray bottle with water and lightly mist the cardboard layers as you add them to the compost bin. This allows you to control the amount of moisture added, ensuring the cardboard is damp but not waterlogged.
- Soak in Water: For particularly dry or thick cardboard, consider soaking it in a container of water before incorporating it into your compost. This method helps the cardboard absorb moisture more evenly and thoroughly.
- Cover with a Tarp: To prevent the cardboard from drying out too quickly, especially in hot or windy conditions, cover the compost pile with a tarp. This helps retain moisture levels and creates a more stable environment for the decomposition process.
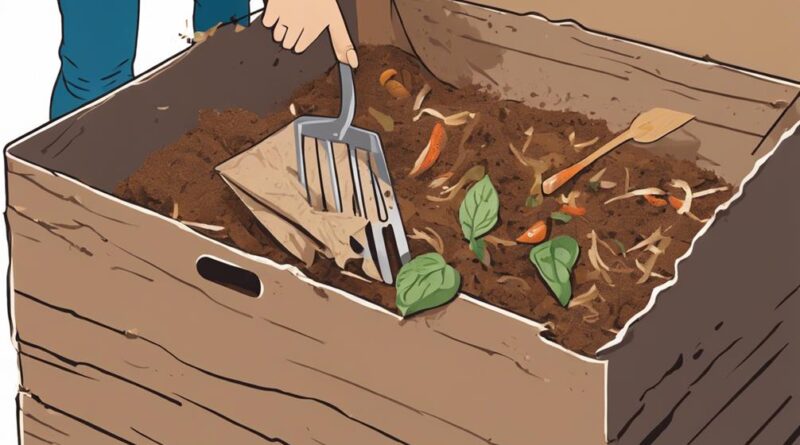
Turning and Aerating the Compost
Turning and aerating the compost helps enhance decomposition by promoting oxygen circulation and mixing organic materials for optimal microbial activity. Aeration techniques are crucial for maintaining aerobic conditions within the compost, as oxygen is necessary for the breakdown of materials. To aerate your compost effectively, consider using a pitchfork or compost turning tool to mix the pile thoroughly. This process helps prevent the formation of anaerobic zones, which can slow down decomposition and cause unpleasant odors.
Temperature control is another important aspect to consider when turning and aerating your compost. By mixing the materials regularly, you can help distribute heat evenly throughout the pile, promoting faster decomposition. Monitoring the internal temperature of the compost can also indicate whether the process is proceeding correctly.
In terms of turning frequency, aim to turn the compost pile at least once a week to ensure proper aeration and mixing of materials. This frequency may vary based on the size of your compost pile and environmental conditions. Additionally, keeping an eye on moisture levels is essential. The compost should feel like a damp sponge – not too dry, but also not waterlogged. Adjusting moisture levels can help create an environment where microorganisms thrive, aiding in the decomposition process.
Monitoring the Composting Process
Monitoring the composting process involves regularly assessing key indicators to ensure optimal conditions for decomposition and microbial activity. By keeping a close eye on specific aspects of your compost pile, you can effectively manage the process and troubleshoot any issues that may arise.
Here are some essential factors to monitor:
- Temperature Control: Check the internal temperature of the compost pile regularly using a compost thermometer. Ideally, the temperature should range between 135-160°F (57-71°C) for efficient decomposition. Adjust the carbon (brown materials) to nitrogen (green materials) ratio if the temperature is too low or add more bulky materials if it's too high.
- Compost Health: Look out for signs of a healthy compost pile, such as earthy smell, steam rising from the pile, and the presence of earthworms. These indicate that the decomposition process is active and working effectively.
- Odor Management and Compost Maturity: Monitor the smell of your compost pile to ensure it remains earthy and pleasant. Foul odors can indicate anaerobic conditions or an imbalance in the compost ingredients. Additionally, assess the maturity of the compost by observing the breakdown of materials. Finished compost should have a dark, crumbly texture with no recognizable original materials.
Using Composted Cardboard in Your Garden
To maximize the benefits of your composted cardboard, consider utilizing it effectively in your garden to enhance soil health and promote plant growth. When using composted cardboard in your garden, you aren't only recycling waste but also providing your plants with essential nutrients and improving the overall quality of your soil.
The garden benefits of incorporating composted cardboard are numerous. It helps in retaining moisture in the soil, reducing the need for frequent watering. Composted cardboard also acts as a natural weed barrier, minimizing weed growth and competition for nutrients among your plants. Moreover, as the cardboard breaks down, it enhances soil structure, allowing for better aeration and root growth.
In terms of soil enrichment, composted cardboard adds valuable organic matter to the soil, increasing microbial activity and nutrient availability for your plants. This organic matter improves the soil's ability to retain nutrients, making them more accessible to the plants. Additionally, the gradual decomposition of cardboard releases beneficial compounds that further contribute to the soil's fertility.
Troubleshooting Common Cardboard Composting Issues
Common cardboard composting issues often arise due to improper moisture levels in the compost pile. Maintaining the right balance of moisture is crucial for successful composting.
Here are some tips to troubleshoot common cardboard composting issues:
- Troubleshooting Cardboard Odors:
- If you notice a foul smell emanating from your compost pile, it could be due to anaerobic conditions caused by compacted cardboard. To remedy this issue, turn the pile regularly to aerate it and add more dry materials like leaves or straw to improve airflow.
- Dealing with Pests:
- Insects and rodents may be attracted to your compost pile if it contains food residues or if the cardboard isn't broken down properly. To deter pests, avoid composting meat or dairy products in the cardboard pile. Additionally, shredding the cardboard into smaller pieces before composting can accelerate decomposition and make it less appealing to pests.
- Accelerating Cardboard Decomposition Process:
- To speed up the breakdown of cardboard in your compost pile, consider soaking the cardboard in water before adding it. This helps soften the material, making it easier for microbes to break down. You can also add nitrogen-rich materials like grass clippings or kitchen scraps to provide a boost of nutrients for the decomposition process.
Frequently Asked Questions
Can I Compost Glossy or Colored Cardboard?
Yes, you can compost glossy or colored cardboard, but it's best to avoid it due to potential toxins in the dyes and coatings. Recycling options for such cardboard are more environmentally friendly.
The environmental impact of composting these types of cardboard is uncertain, as the chemicals used in the coloring and glossing processes may not break down properly.
It's safer to opt for plain, untreated cardboard for composting to ensure a healthier composting process.
How Long Does It Take for Cardboard to Break Down?
Cardboard breakdown timeline varies based on environmental conditions. It typically takes around 2 months to 4 months for cardboard to break down completely. This process can be faster in warm and moist environments.
Recycling cardboard through composting has positive environmental impacts, reducing waste in landfills and contributing to nutrient-rich soil. Composting cardboard at home is an eco-friendly way to manage waste and support sustainable practices.
Should I Remove Sticky Tapes and Labels From Cardboard?
When recycling cardboard, it's best to remove sticky tapes and labels before composting. The recycling benefits come from ensuring the cardboard can break down efficiently without any non-biodegradable materials hindering the process.
Leaving these items on the cardboard can have a negative environmental impact as they may not decompose properly and could contaminate the compost. By taking the time to remove them, you contribute to a cleaner and more effective recycling process.
Can I Compost Pizza Boxes With Grease Stains?
You can compost pizza boxes with grease stains, but it may affect the effectiveness of the composting process. The grease can slow down decomposition and attract pests.
To enhance composting, tear off the greasy parts and recycle the clean sections. Alternatively, use the greasy parts as a weed barrier in your garden or for starting fires.
Consider these options to make the most of your pizza box waste.
Will Composting Cardboard Attract Pests Like Rodents?
When composting cardboard, pest prevention is crucial to avoid attracting rodents. Properly managing your compost pile by regularly turning it and covering food scraps with cardboard layers can help deter pests.
Ensuring the compost pile reaches high temperatures can also discourage rodents. By following these practices, you can effectively compost cardboard at home while minimizing the risk of attracting unwanted critters.
Conclusion
In conclusion, composting cardboard at home can be a simple and effective way to reduce waste and improve your garden's soil health. By following these six essential tips, you can successfully compost cardboard and create nutrient-rich compost for your plants.
Remember to:
- Choose the right cardboard
- Properly prepare it
- Layer it in your compost bin
- Keep it moist
- Turn and aerate the compost
- Monitor the process
- Use the finished compost in your garden
Happy composting!