
5 Best Methods for Ceiling Home Lighting Installation
This post may contain affiliate links which means I may receive a commission for purchases made through links. As an Amazon Associate, I earn from qualifying purchases. Learn more on my Private Policy page.
When it comes to installing ceiling home lighting, it's like putting together a puzzle; each piece needs to fit just right to create a beautiful picture. But how do you ensure those pieces come together seamlessly?
By understanding the five best methods for ceiling home lighting installation. From planning the layout to testing and adjusting the system, these steps will illuminate your space effectively and elegantly.
So, are you ready to shed light on the perfect ambiance for your home?
Planning the Lighting Layout
When considering how to plan the lighting layout for your ceiling home installation, start by assessing the room's dimensions and purpose. The layout design plays a crucial role in determining the overall ambiance and functionality of the space. Begin by identifying the key areas that require adequate lighting, such as workspaces, seating areas, or decorative features. Once you have a clear understanding of the room's layout design, you can start planning the placement of lights accordingly.
Light placement is essential for creating a well-balanced and visually appealing environment. When mapping out where to install lights, consider factors such as the room's natural light sources, the positioning of furniture, and any architectural features you want to highlight. For example, in a kitchen, under cabinet lighting can enhance visibility for food preparation, while pendant lights above an island can add a touch of style. In a living room, strategically placed floor lamps can create cozy reading nooks, while recessed lighting can provide overall illumination without taking up space.
Choosing the Right Fixtures
To ensure optimal lighting for your ceiling home installation, select fixtures that complement the room's design and meet your specific lighting needs. When choosing the right fixtures, consider factors such as the room's size, ceiling height, and the ambiance you want to create. Here are some tips to guide you in making the best fixture selection:
- Fixture Selection: Opt for fixtures that match the style of your room. For example, for a modern aesthetic, sleek and minimalistic fixtures may be ideal, while for a more traditional look, ornate chandeliers or pendant lights could be a better fit. Consider the color scheme of the room as well, ensuring the fixtures blend harmoniously with the existing decor.
- Light Placement: Strategically place fixtures to ensure even distribution of light throughout the room. Consider the function of the space when deciding where to install fixtures. For example, in a kitchen, under cabinet lighting can provide task lighting, while in a living room, a combination of ceiling lights and floor lamps can create a cozy ambiance.
- Energy Efficiency: Choose fixtures that are energy-efficient to save on electricity costs in the long run. LED fixtures, for instance, consume less energy and have a longer lifespan compared to traditional incandescent bulbs. Prioritize fixtures with adjustable brightness levels to easily adapt the lighting to different activities and moods.
Preparing the Ceiling for Installation
Ensure that your ceiling is clean and free of any obstructions before beginning the installation process. Proper ceiling surface preparation is crucial for a successful lighting installation. Start by removing any dust, dirt, or debris from the ceiling using a vacuum cleaner or a damp cloth. This will ensure that the lighting fixtures adhere properly and function efficiently.
Additionally, consider the paint color choice for your ceiling. Opting for a lighter paint color can help reflect more light around the room, making it appear brighter and more spacious. Darker colors tend to absorb light, which can create a cozier atmosphere but may require more light fixtures to adequately illuminate the space.
Before proceeding with the installation, make sure to inspect the ceiling for any cracks, holes, or imperfections. These should be repaired and smoothened out to provide a uniform surface for mounting the lighting fixtures. Any existing electrical connections should also be checked to ensure they're in good condition and can support the new lighting system.
Wiring the Lighting System
Effective installation of the lighting system requires precise wiring techniques to ensure proper functionality and safety. When wiring the lighting system in your home, it's crucial to pay attention to wire management and follow safety precautions.
- Organize the Wires: Keeping the wires organized is essential for a clean and efficient installation process. Use cable clips or ties to secure the wires along the ceiling or walls, preventing any dangling or entangled wires that could lead to safety hazards.
- Proper Insulation: Ensure that all wires are properly insulated to prevent any risk of electrical shock or short circuits. Use insulated tape or conduit to cover exposed wires and protect them from damage.
- Testing the Connections: After wiring the lighting system, always test the connections to ensure everything is functioning correctly. Use a voltage tester to check for any potential issues before finalizing the installation.
Remember to follow safety guidelines throughout the wiring process to guarantee a safe and effective lighting system in your home. By paying attention to wire management and taking necessary safety precautions, you can ensure a well-organized and secure lighting installation.
Installing Recessed Lights
For successful installation of recessed lights, focus on positioning them strategically in the ceiling to achieve optimal lighting coverage. When installing recessed lights, it's essential to consider the light bulb options available. LED bulbs are a popular choice for recessed lighting due to their energy efficiency and longevity. They produce bright light while consuming less energy compared to traditional incandescent bulbs, helping you save on electricity bills in the long run.
When positioning the recessed lights, ensure they're evenly spaced to avoid any dark spots in the room. Additionally, consider the beam angle of the light bulbs to determine the spread of light they'll provide. Opt for wider beam angles for broader coverage in larger rooms and narrower angles for more focused lighting in specific areas.
Energy efficiency considerations are crucial when installing recessed lights. Apart from choosing LED bulbs, you can also install dimmer switches to adjust the light output based on your needs, further saving energy. Additionally, consider using insulation around the lights to prevent heat loss and improve the overall energy efficiency of your home.
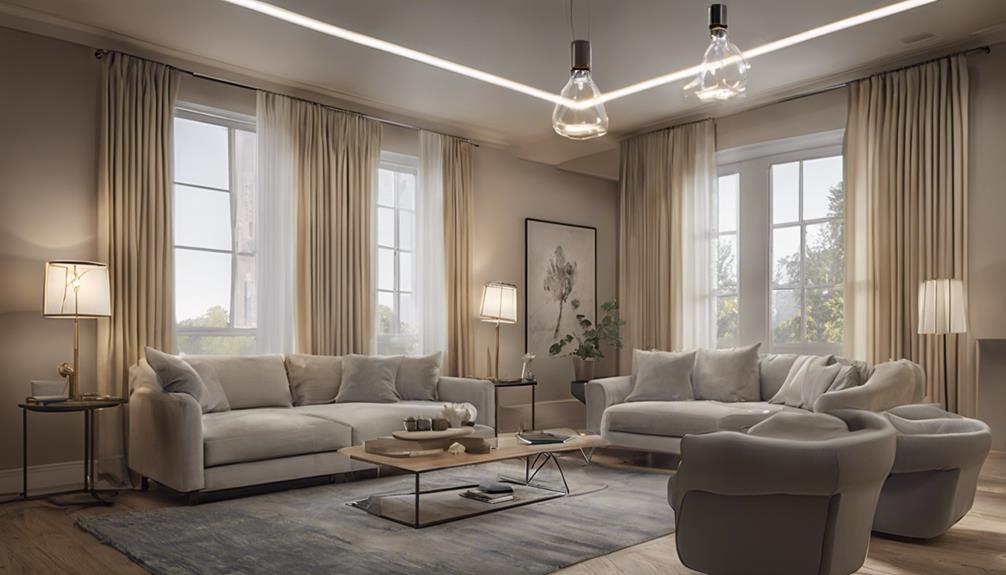
Mounting Pendant or Chandelier Lights
When mounting pendant or chandelier lights, consider the room's layout and overall aesthetic to ensure they complement the space effectively. Proper placement and sizing are crucial to achieving the desired lighting impact. Here are some key points to keep in mind:
- Chandelier Placement and Height:
For chandeliers, the ideal placement is usually in the center of the room to create a focal point. The height at which you hang the chandelier can vary based on the room's ceiling height. As a general rule, ensure that the bottom of the chandelier is at least 30 inches above the table or floor below to prevent it from overwhelming the space.
- Pendant Light Styles and Sizes:
Pendant lights come in a variety of styles and sizes, making them versatile for different spaces. Consider the design theme of the room when selecting pendant lights. Larger pendants work well in spacious areas or rooms with high ceilings, while smaller pendants are better suited for more compact spaces.
- Overall Aesthetic:
When choosing pendant or chandelier lights, aim for coherence with the room's decor. Whether you opt for a modern, minimalist pendant or a classic crystal chandelier, ensure that it blends harmoniously with the existing design elements in the room, enhancing the overall aesthetic appeal.
Adding Dimmer Switches
Consider the ambiance you desire and the flexibility you seek when adding dimmer switches to your home lighting setup. Dimmer switch benefits are numerous, offering you the ability to control the brightness of your lights according to your mood or the time of day. With a dimmer switch, you can create a cozy atmosphere for a movie night, increase brightness for reading, or set a relaxing low light for winding down in the evening.
When considering dimmer switch compatibility, ensure that the type of bulbs you have installed in your fixtures are dimmable. LED and incandescent bulbs are typically dimmer-friendly, but some CFLs may not be compatible. It's essential to check the packaging or consult with a professional if you're unsure. Additionally, make sure the dimmer switch you choose is suitable for the specific type of lighting you have in place.
Testing and Adjusting the Lighting System
To ensure optimal performance and functionality, test and adjust your lighting system after adding dimmer switches to your home setup. Start by following a simple testing procedure to make sure everything works as intended. Turn on the lights and check if each fixture responds correctly to the dimmer switch adjustments. If you notice any flickering or inconsistent dimming, troubleshoot the connections before proceeding.
Next, focus on brightness adjustment to customize the lighting to your liking. Dim the lights to various levels and assess the ambiance created in the room. Ensure that the brightness settings are comfortable for different activities, such as reading, relaxing, or entertaining guests. Fine-tune the dimmer switches until you achieve the desired lighting effect throughout the space.
Remember that testing and adjusting your lighting system is crucial for achieving the right atmosphere in your home. By carefully evaluating the functionality and brightness levels, you can create a comfortable and inviting environment for any occasion. Take the time to perfect your lighting setup, and enjoy the flexibility and control that dimmer switches bring to your home.
Frequently Asked Questions
What Are the Best Types of Bulbs to Use for Ceiling Home Lighting Installation?
When choosing bulbs for your ceiling lights, consider factors like brightness and color temperature. Opt for bulbs that are dimmer-compatible for adjustable lighting. Smart technology integration can enhance convenience.
For ceiling home lighting installation, selecting the right bulbs is crucial. Make sure to balance brightness, color temperature, and compatibility with dimmers to create the perfect ambiance in your home. Smart bulbs can offer additional features for a modern touch.
How Can I Ensure That My Ceiling Lighting Installation Complies With Building Codes and Regulations?
To ensure your ceiling lighting installation complies with building codes and regulations, follow safety precautions and proper installation techniques. Check permit requirements and adhere to electrical codes.
Before starting the installation, research the specific regulations in your area. Make sure to use appropriate wiring, fixtures, and mounting methods. It's crucial to prioritize safety and compliance throughout the entire process.
Are There Any Energy-Efficient Options Available for Ceiling Lighting Installation?
To make your ceiling lighting energy-efficient, consider using smart lighting with automation features.
Opt for dimmable LED bulbs that consume less power and last longer than traditional bulbs.
Can Ceiling Lighting Installation Be Easily Customized for Different Rooms and Spaces in a Home?
Custom design your ceiling lighting installation by incorporating dimmer switches for adjustable brightness in various rooms. Enhance flexibility with smart technology that allows for remote control and scheduling.
Explore a range of color options to create the perfect ambiance for each space in your home. Personalize your lighting setup to fit your needs and preferences effortlessly.
How Do I Maintain and Clean My Ceiling Lighting Fixtures to Ensure They Last a Long Time?
To maintain and clean your ceiling lighting fixtures effectively, start by dusting them regularly with a soft cloth or duster.
For tougher grime, use a mild soapy water solution and a soft sponge to gently wipe the fixtures.
Avoid harsh chemicals that can damage the finish.
Remember to turn off the power before cleaning to prevent accidents.
Regular maintenance and gentle cleaning techniques will ensure your ceiling lighting fixtures last a long time.
Conclusion
In conclusion, by following these 5 best methods for ceiling home lighting installation, you can ensure a well-lit and aesthetically pleasing living space. Proper planning, choosing the right fixtures, preparing the ceiling, wiring the system, and installing the lights correctly will result in a functional and stylish lighting system for your home.
Don't forget to add dimmer switches for added control and ambiance. Test and adjust as needed to achieve the perfect lighting for your space.