
7 Best DIY Plumbing Techniques for Home Improvement
This post may contain affiliate links which means I may receive a commission for purchases made through links. As an Amazon Associate, I earn from qualifying purchases. Learn more on my Private Policy page.
You might think that plumbing is a job best left to the professionals, but with the right techniques and a little bit of know-how, you can tackle many common plumbing issues on your own.
From fixing leaky faucets to unclogging drains, there are several DIY plumbing techniques that can save you time and money.
In this article, you'll discover practical tips and tricks to address some of the most common plumbing problems in your home, allowing you to maintain and improve your plumbing system with confidence.
Pipe Insulation for Energy Efficiency
To improve energy efficiency in your home, consider insulating your pipes to prevent heat loss and save on heating costs. Pipe insulation is a simple yet effective way to enhance the thermal efficiency of your plumbing system, leading to significant energy savings.
By wrapping insulation around your hot water pipes, you can minimize heat dissipation and ensure that the water stays hot as it travels from the heater to the faucets, reducing the need to constantly reheat water and ultimately cutting down on energy usage.
Insulating your pipes also helps in maintaining the temperature of the water, especially during cold weather, which further contributes to energy savings. When pipes aren't insulated, the heat from the water can escape into the surrounding environment, leading to a drop in temperature as the water moves through the pipes. This results in the water heater having to work harder and consume more energy to maintain the desired temperature. However, with proper pipe insulation, you can prevent this heat loss, improve thermal efficiency, and ultimately reduce your energy consumption and utility bills.
In addition to conserving energy, insulating your pipes can also prevent them from freezing during the winter months. By retaining the heat within the pipes, insulation helps to protect them from freezing temperatures, reducing the risk of costly damage and repair.
Therefore, by investing in pipe insulation, you not only enhance the thermal efficiency of your plumbing system but also ensure long-term energy and cost savings.
Unclogging Drains and Pipes
If you're dealing with a clogged drain or pipe, there are several DIY techniques you can use to effectively clear the blockage. Two of the most common methods are using chemical drain cleaners and employing plunging techniques.
Chemical drain cleaners are readily available at most hardware or home improvement stores. These cleaners work by dissolving the organic materials causing the blockage. When using chemical drain cleaners, it's important to carefully follow the instructions provided by the manufacturer. Be sure to wear protective gloves and goggles to avoid any skin or eye irritation. Pour the recommended amount of cleaner into the clogged drain, wait for the specified amount of time, and then flush the drain with hot water. However, keep in mind that chemical drain cleaners can be harsh and may damage older pipes, so use them sparingly and consider alternative methods if you have older plumbing.
Plunging is another effective DIY technique for unclogging drains and pipes. To use a plunger, ensure there's enough water in the clogged fixture to cover the bottom of the plunger. Place the plunger over the drain, ensuring a tight seal, and push and pull it in a rapid motion to create pressure and dislodge the clog. Repeat this process several times until the water begins to drain freely.
Fixing Leaky Faucets and Pipes
Fix those pesky leaks in your faucets and pipes with simple DIY techniques that can save you time and money.
Here are four effective methods to help you fix leaky faucets and pipes:
- Pipe Soldering Techniques: If you have a leaking pipe joint, using pipe soldering techniques can provide a long-term solution. To do this, first, ensure the pipe is dry and clean. Apply flux to the joint and heat it with a soldering torch. Once the flux starts to bubble, touch the solder to the joint and allow it to flow around the fitting, creating a waterproof seal.
- Waterproof Sealants: For minor pipe leaks or dripping faucets, using waterproof sealants can be a quick fix. Apply the sealant to the leaking area and allow it to dry according to the manufacturer's instructions. This can provide a temporary solution until a more permanent fix can be implemented.
- Water Pressure Regulation: High water pressure can cause stress on your pipes, leading to leaks and potential bursts. Install a pressure regulator to maintain a safe and consistent water pressure throughout your plumbing system.
- Pipe Corrosion Prevention: Regularly inspect your pipes for signs of corrosion. Consider installing corrosion-resistant pipes or applying coatings to existing pipes to prevent future leaks.
Installing a New Toilet
After addressing leaks in your faucets and pipes, you can now tackle the task of installing a new toilet in your home for an updated and efficient plumbing fixture.
To begin, ensure the old toilet is removed and the flange is cleaned. Next, place the new wax ring on the flange and secure it properly. Then, carefully lower the new toilet onto the flange, making sure it's properly aligned and seated. Once in place, bolt the toilet to the floor, ensuring it's stable and doesn't wobble.
Following the toilet flange installation, it's time to focus on the water supply line. Connect the water supply line to the bottom of the tank, ensuring it's tightly secured to prevent any leaks. Turn on the water supply and check for any potential leaks at the connection points.
After the water supply line installation, don't forget to adjust the flush valve to ensure proper flushing. This adjustment will help regulate the water level in the tank, allowing for efficient flushing while conserving water.
Repairing or Replacing a Showerhead
Consider upgrading your shower experience by repairing or replacing your showerhead for improved water flow and functionality.
Here are four simple steps to help you repair or replace your showerhead:
- Showerhead maintenance and cleaning: Regularly clean your showerhead to remove mineral deposits and debris that can clog the water flow. Unscrew the showerhead, soak it in a solution of vinegar and water to dissolve mineral buildup, and scrub it with a brush before reattaching it.
- Check for water pressure issues: If you're experiencing low water pressure from your showerhead, it may be due to a clog. Remove the showerhead and inspect the water flow restrictor for any debris. Clean or remove the restrictor to improve water pressure.
- Adjusting water pressure: Some showerheads come with adjustable settings for water pressure. If your showerhead has this feature, experiment with different settings to find the water pressure that suits you best.
- Consider replacing the showerhead: If cleaning and maintenance don't improve water flow and pressure, it may be time to replace the showerhead altogether. Choose a new showerhead that matches your preferences for water flow, pressure, and spray pattern.
Sealing Leaky Joints and Connections
To prevent leaks and ensure proper functioning, it's essential to effectively seal all joints and connections in your plumbing system. Waterproofing techniques and proper sealing materials are crucial for maintaining a leak-free plumbing system.
When it comes to joint sealing and connection repair, there are a few DIY techniques you can use to address any leaks or potential issues.
One of the most common methods for sealing leaky joints is using joint compound or thread seal tape. Joint compound, also known as pipe dope, is applied to the threads of pipes and fittings before they're screwed together. This creates a tight seal and prevents water from leaking out. Thread seal tape, commonly known as Teflon tape, is wrapped around the threads of pipes and fittings to provide a watertight seal.
For connection repair, one effective DIY technique involves using epoxy putty. Epoxy putty can be used to seal leaks or repair cracks in pipes and fittings. Simply knead the putty to activate it, then apply it to the leaking area. The putty will harden and form a strong, waterproof seal, effectively repairing the connection.
In addition to these DIY techniques, it's important to regularly inspect your plumbing system for any signs of leaks or damage. Addressing small issues promptly can prevent larger, more costly problems down the line.
Clearing and Preventing Toilet Clogs
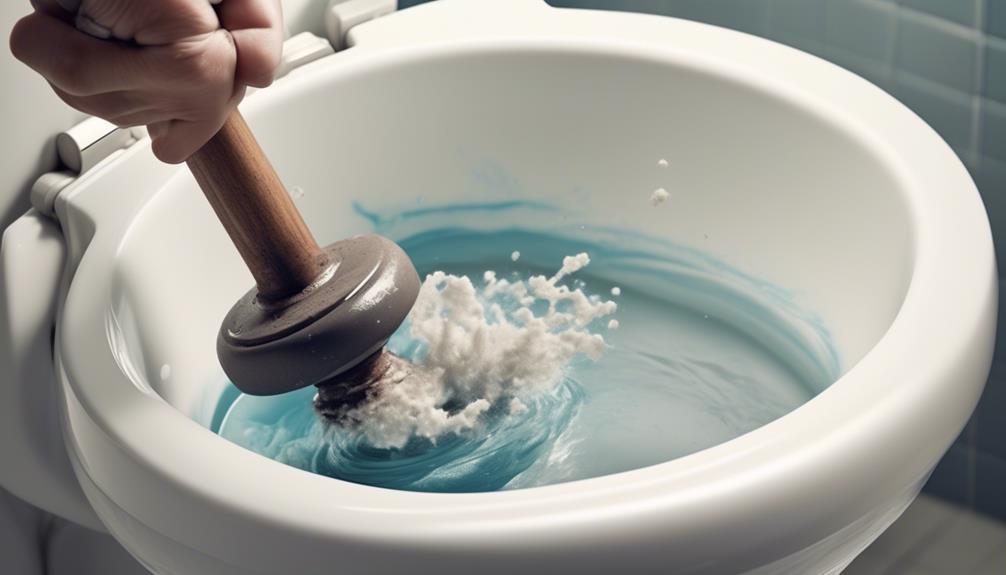
When encountering toilet clogs, your first step is to assess the severity of the blockage and determine the most suitable method for clearing it.
Here are some effective techniques for dealing with toilet clogs:
- Plunging: This is often the go-to method for clearing minor clogs. Ensure a tight seal around the drain and use a vigorous pumping motion to dislodge the blockage.
- Auger or Snake: If plunging doesn't work, a toilet auger or snake can be used to reach deeper clogs. Insert the auger into the drain and rotate the handle to break up and remove the obstruction.
- Natural Cleaners: For mild clogs, consider using a mixture of hot water, dish soap, and vinegar to break up the blockage. Let the solution sit for a while before attempting to flush the toilet.
- Regular Maintenance: To prevent future clogs, consider implementing some toilet maintenance practices. This includes avoiding flushing non-flushable items, such as wipes and sanitary products, and periodically using a mixture of baking soda and vinegar to keep the drain clear.
In addition to these techniques, clog prevention is key to maintaining a healthy toilet system. Being mindful of what's flushed down the toilet and performing regular maintenance can go a long way in preventing clogs and maintaining a smoothly running toilet.
Upgrading Plumbing Fixtures
Looking to enhance your home's aesthetics and functionality? Consider upgrading your plumbing fixtures to achieve a modern and efficient look.
Upgrading your plumbing fixtures can't only improve the overall appearance of your home but also enhance the functionality of your plumbing system. When considering upgrades, it's important to pay attention to water pressure and rust removal to ensure that your fixtures are performing optimally.
When upgrading your plumbing fixtures, one crucial aspect to consider is water pressure. Low water pressure can be caused by various factors such as mineral build-up, pipe corrosion, or outdated fixtures. Upgrading to newer, more efficient fixtures can help improve water pressure, providing you with a more satisfying and effective water flow throughout your home.
Additionally, modern fixtures are designed to maximize water pressure while maintaining water efficiency, helping you save on water usage and costs in the long run.
Another important consideration when upgrading fixtures is rust removal. Over time, older fixtures may develop rust, which not only affects the appearance but can also impact water quality. Upgrading to rust-resistant fixtures can help prevent issues related to rust, ensuring that your water remains clean and safe for use.
Frequently Asked Questions
Can I Use Pipe Insulation to Prevent Frozen Pipes in Extremely Cold Climates?
You can use pipe insulation to prevent frozen pipes in extremely cold climates. By insulating your pipes, you can help maintain a consistent temperature and prevent potential damage. Using heat tape and insulating faucets can also be beneficial.
What Are Some DIY Methods for Preventing Mineral Buildup in Drains and Pipes?
To prevent mineral buildup in drains and pipes, try DIY descaling using natural, homemade remedies. Vinegar and baking soda can be effective in preventing and removing mineral deposits. Regularly flushing drains with hot water can also help prevent buildup.
How Can I Identify the Source of a Hidden Leak in My Plumbing System?
To identify a hidden leak in your plumbing system, use thermal imaging and leak detection techniques. Look for temperature variations and use a moisture meter to pinpoint the source. Check for water stains and mold to confirm the location.
Are There Any Special Considerations for Installing a New Toilet in a Bathroom With Limited Space?
When installing a new toilet in a small bathroom, consider space-saving options like corner toilets or wall-mounted models. Plan your DIY bathroom layout carefully to ensure proper clearance and functionality. Take measurements and research installation techniques.
What Are Some Eco-Friendly Options for Upgrading Plumbing Fixtures in My Home?
When upgrading plumbing fixtures in your home, consider eco-friendly materials and green plumbing solutions. Look for low-flow faucets, showerheads, and toilets to conserve water, and opt for energy-efficient water heaters to reduce your environmental impact.
Conclusion
In conclusion, with these 7 DIY plumbing techniques, you can improve your home's energy efficiency, fix common plumbing issues, and upgrade your fixtures without having to call a professional.
By taking the time to learn and apply these techniques, you can save money and feel more confident in handling basic plumbing tasks around your home.
So, roll up your sleeves and get ready to tackle your next plumbing project!