9 Easy Steps to DIY Home Improvements
This post may contain affiliate links which means I may receive a commission for purchases made through links. As an Amazon Associate, I earn from qualifying purchases. Learn more on my Private Policy page.
Embarking on DIY home improvements is like setting sail on a journey to transform your living space into something truly remarkable. With a bit of patience and know-how, you can breathe new life into your home without breaking the bank.
But where to start? Follow these 9 easy steps to take your home from mundane to magnificent. With a solid plan in place, you'll be amazed at what you can achieve with just a little effort and some basic tools.
So, roll up your sleeves and let's get started on this transformative adventure.
Assessing the Project
Before beginning any DIY home improvement project, it's crucial to assess the scope and requirements to ensure a successful outcome. Start by assessing your needs. Take a walk through your home and make a list of all the things that need attention. This could include anything from a leaky faucet to a fresh coat of paint in the living room.
Once you have a comprehensive list, it's time to prioritize. Choosing priorities is essential to ensure that you tackle the most critical projects first. Consider factors such as safety, functionality, and visual impact when deciding what to prioritize. For instance, a broken step might take precedence over a purely aesthetic project.
After you've assessed your needs and chosen your priorities, it's time to evaluate your skills and resources. Be honest with yourself about what you can realistically accomplish. It's great to challenge yourself, but a DIY project should be within your capabilities to avoid frustration and potential safety hazards. If you're unsure about a specific task, consider seeking guidance from online tutorials or enlisting the help of a friend or professional.
Setting a Budget
Assess your financial resources and determine a realistic budget for your DIY home improvement project. Start by allocating a specific budget for each aspect of the project, such as materials, tools, and potential hired help. Cost estimation is crucial, so research the prices of the items you need and add a buffer for unexpected expenses.
Establish a clear budget allocation by prioritizing the most critical areas of improvement and allocating funds accordingly. This will help you avoid overspending and keep your project on track.
Financial planning is essential for the success of your DIY home improvement project. Take the time to evaluate your current financial situation and decide how much you can realistically allocate to the project without compromising your overall financial stability. Consider using expense tracking tools or apps to monitor your spending throughout the project. This will help you stay within your budget and make adjustments if necessary.
Remember to set aside some extra funds for any unforeseen costs that may arise.
Planning the Design
Start by creating a detailed design plan that outlines the specific changes and improvements you want to make to your home. Begin by gathering design inspiration from various sources such as home improvement magazines, websites, or even social media platforms like Pinterest and Instagram. Look for styles and themes that resonate with you and take note of the color palettes that catch your eye. This will help you in envisioning the overall look and feel you want to achieve for your space.
When planning the design for your home improvements, consider the functionality of the space and how you want it to flow. Think about the activities that will take place in each area and how you can optimize the layout to suit your lifestyle. Pay attention to the existing architectural features and how you can enhance or modify them to complement your design vision.
Additionally, it's essential to choose a color palette that creates a cohesive and harmonious atmosphere throughout your home. Consider the mood you want each room to evoke and select colors that align with that vision. Whether you prefer a bold and vibrant scheme or a calming and neutral one, the color palette will set the tone for the entire space.
Gathering Materials and Tools
To get started on gathering materials and tools for your DIY home improvements, you'll want to create a comprehensive list of everything you'll need for each specific project. Sourcing supplies is an essential part of this process. After creating your list, take inventory of what you already have and what you need to purchase or borrow. Consider visiting local hardware stores, online retailers, or thrift shops to find the best deals on the materials and tools you require. It's also a good idea to check for any upcoming sales or discounts to save money on your purchases.
Once you have all the necessary materials and tools, it's time to organize your workspace. Clear the area where you'll be working and ensure that it's clean and free from any clutter. This won't only make it easier to find what you need but also create a safer environment for your DIY projects. Invest in storage solutions such as bins, shelves, and tool racks to keep everything neatly organized and easily accessible. Labeling containers and drawers can also help you locate items quickly during your home improvement tasks.
Preparing the Work Area
Now that you have organized your workspace and gathered all the necessary materials and tools, ensure that the work area is well-lit and free from any potential hazards before beginning your DIY home improvement project. Start by clearing clutter from the work area to create a safe and organized space. This includes removing any unnecessary items, such as furniture, decorations, or other objects that could obstruct your work or pose a safety risk.
Next, take the time to protect surfaces that aren't intended to be worked on. Use drop cloths, plastic sheeting, or painter's tape to cover floors, countertops, and any nearby furniture to prevent accidental spills, scratches, or damage from tools and materials. This simple step will save you time on cleaning and potential repair costs in the long run.
Furthermore, ensure that the work area is well-ventilated, especially if you're using any chemicals or materials with strong odors. Open windows or use fans to improve air circulation and maintain a comfortable and safe environment for your DIY project.
Lastly, double-check that all electrical outlets and cords are in good condition and that any power tools you plan to use are functioning properly. Safety should always be a top priority, so take the time to inspect your work area thoroughly before diving into your home improvement project.
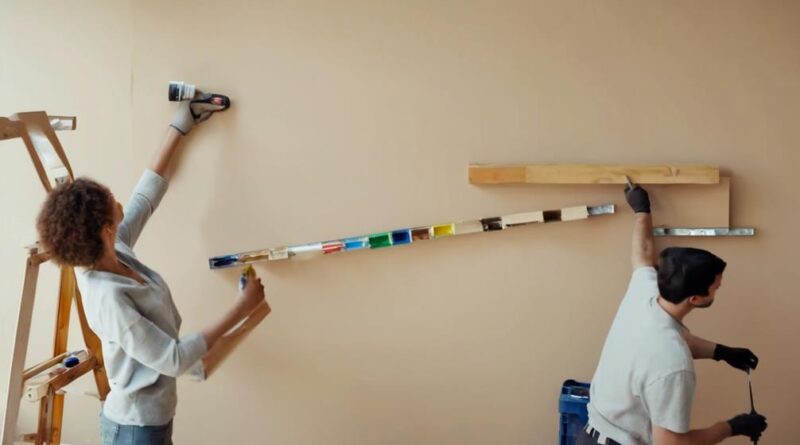
Executing the Improvements
Once you have thoroughly prepared the work area, proceed with executing the improvements by carefully following your project plan and ensuring that all safety measures are in place. Time management is crucial at this stage to ensure that the project stays on track. Allocate specific time slots for each task and try to stick to them as closely as possible. This will help you stay organized and prevent the project from dragging on longer than necessary.
In addition to time management, safety precautions should be a top priority during the execution of the improvements. Always wear appropriate safety gear, such as goggles, gloves, and a mask if needed. If you're working with power tools, make sure to read and follow the safety instructions provided by the manufacturer. It's also important to keep the work area tidy and free from any tripping hazards.
As you work through the project, regularly assess the progress against your project plan to ensure that you're staying on schedule. If you encounter any unexpected issues or delays, take the time to reassess your plan and make adjustments as needed. By staying vigilant and adaptable, you can maintain control over the project and avoid unnecessary setbacks.
Adding Finishing Touches

Start adding the finishing touches to your DIY home improvements by carefully selecting and applying the appropriate paint or stain to achieve the desired look and protection for your project.
When choosing decor for your home, consider the overall aesthetic you want to achieve. Opt for decor pieces that complement the style of your home and the improvements you've made. Whether it's selecting the right curtains, throw pillows, or artwork, each addition should enhance the aesthetics of the space.
Incorporate elements that tie the room together, such as coordinating colors or themes. For instance, if you've renovated your living room with a modern aesthetic, choose decor items that reflect this style, like sleek metallic accents or minimalist wall art.
Additionally, consider the lighting in the room. Proper lighting can greatly enhance the ambiance and overall feel of the space. Choose light fixtures that not only provide adequate illumination but also add a decorative element to the room.
Furthermore, pay attention to the small details. Upgrading hardware such as doorknobs, handles, and drawer pulls can make a significant impact. These subtle changes can elevate the look of your space and tie in with the overall theme of your home.
Evaluating the Results
After adding the finishing touches to your DIY home improvements, it's important to evaluate the results to ensure that the changes have achieved the desired aesthetic and functionality for your space. Measuring the success of your project involves assessing whether the improvements have enhanced the overall look and feel of the area. Take a step back and consider if the changes align with your initial vision and if they've added value to your home.
Customer satisfaction is another crucial aspect to consider when evaluating the results of your DIY home improvements. Seek feedback from family members or friends who can provide honest opinions about the changes. Additionally, if you'd professionals assist with certain aspects of the project, such as plumbing or electrical work, it's important to ensure that their work meets your expectations.
Analyzing the impact of your DIY improvements also involves considering future considerations. Take note of any areas that may need further attention or maintenance in the future. This could include identifying potential issues that may arise, or planning for additional improvements down the line.
Frequently Asked Questions
Are There Any Specific Safety Precautions or Potential Hazards to Be Aware of When Undertaking DIY Home Improvements?
When doing DIY home improvements, it's crucial to prioritize safety precautions. Be aware of potential hazards and conduct a risk assessment. Always wear protective gear like gloves and goggles. Your safety should never be compromised.
How Can I Ensure That My DIY Home Improvements Are in Compliance With Local Building Codes and Regulations?
Make sure your DIY home improvements comply with local building codes and regulations. Check for safety precautions and potential hazards. Research the specific requirements for your area and consult with professionals to ensure compliance.
What Are Some Common Mistakes to Avoid When Executing DIY Home Improvements?
When executing DIY home improvements, common mistakes to avoid include poor quality control, mismanaged budgets, and inadequate time management. Ensure you prioritize these aspects to achieve successful and satisfying results for your home projects.
How Can I Effectively Troubleshoot and Address Any Unexpected Challenges That May Arise During the DIY Home Improvement Process?
When tackling DIY home improvements, effective troubleshooting tips are essential. Prioritize resource management by staying organized and flexible. Keep a toolbox handy, research solutions online, and don't hesitate to seek help from professionals if needed.
Are There Any Eco-Friendly or Sustainable Options to Consider When Gathering Materials for DIY Home Improvements?
When gathering materials for your DIY home improvements, consider eco-friendly options like bamboo, reclaimed wood, and recycled glass. Sustainable choices like low-VOC paint and energy-efficient appliances also help reduce your environmental impact.
Conclusion
Now that you've completed your DIY home improvements, take a moment to step back and admire your hard work. You've not only enhanced the beauty and functionality of your home, but you've also gained valuable skills and saved money in the process.
Enjoy your improved space and take pride in the fact that you were able to tackle these projects on your own. Great job!